In the ever-evolving landscape of technology and creativity, artificial intelligence has emerged as a powerful tool capable of producing awe-inspiring works of art with relative ease, making artistic expression accessible to a wider audience.
As AI algorithms continue to push the boundaries of what is creatively achievable, some artists find themselves torn between marveling at the breathtaking beauty of AI-generated masterpieces and grappling with concerns about its impact on the traditional artistic landscape. While a recent legal case [1] highlighted certain flaws in artists' attempts to hold AI companies accountable, their concern indicates the undeniable brilliance of the current state of AI-generated art and the implications on the future of the artistic process.
However, while the technology is impressive at generating realistic images and recreating the art styles of famous artists, it often falls short in generating images with the precise style we desire right out of the box. To bridge this gap and teach the model about our unique artistic style, fine-tuning becomes essential. In this blog post, we will explore finetuning Stable Diffusion to generate WhatsApp stickers.
tagPreparing the Data
Before we embark on our sticker-generating journey, we must first gather the necessary data to train our model. You can use your own sticker packs or pick from the vast collection available on sites like Sticker Maker. For this blog post, we will be using the Vitavitacat sticker pack.

Before we can use the stickers for training, we must first do some cleaning.
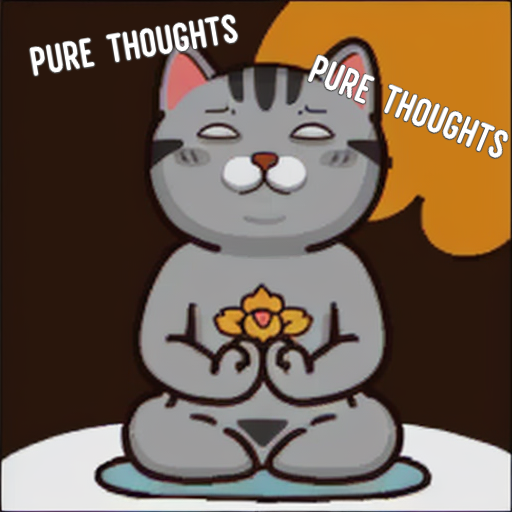
As of writing in August 2023, the Stable Diffusion models have a hard time generating text. If we leave the text in the images, our trained model will generate gibberish text which we will have to clean out in post-processing.

To prevent this, we need to remove the text in the image. To do this, just load your images into your favorite photo editing tool and erase the text:


Save all your cleaned images into a folder on your machine. Before we get to training, let’s take a brief detour to talk about how we would evaluate our model.
tagEvaluation: CLIP score
To evaluate how well our model has learned our sticker style, we can use a CLIP (Contrastive Language-Image Pretraining) score. CLIP [5] is a model that was trained for image and text similarity. The CLIP model [6] can be used to calculate a similarity metric between a pair of images or text which lies between 0 and 1, where 0 indicates that the pair are very different and 1 indicates that the pair are exactly the same.
We will calculate two types of CLIP Score to measure how well our model is doing:
tagStyle Alignment
In order to measure how well our model has learned the overall style of our images, we will generate images using our trained model and compare their similarity with the images we prepared in our training dataset.
tagText-Image Alignment
We also want to know how well our model is following the text prompts during generation. To do this, we will generate images using our trained model and compare their similarity with a set of prompts that we provide.
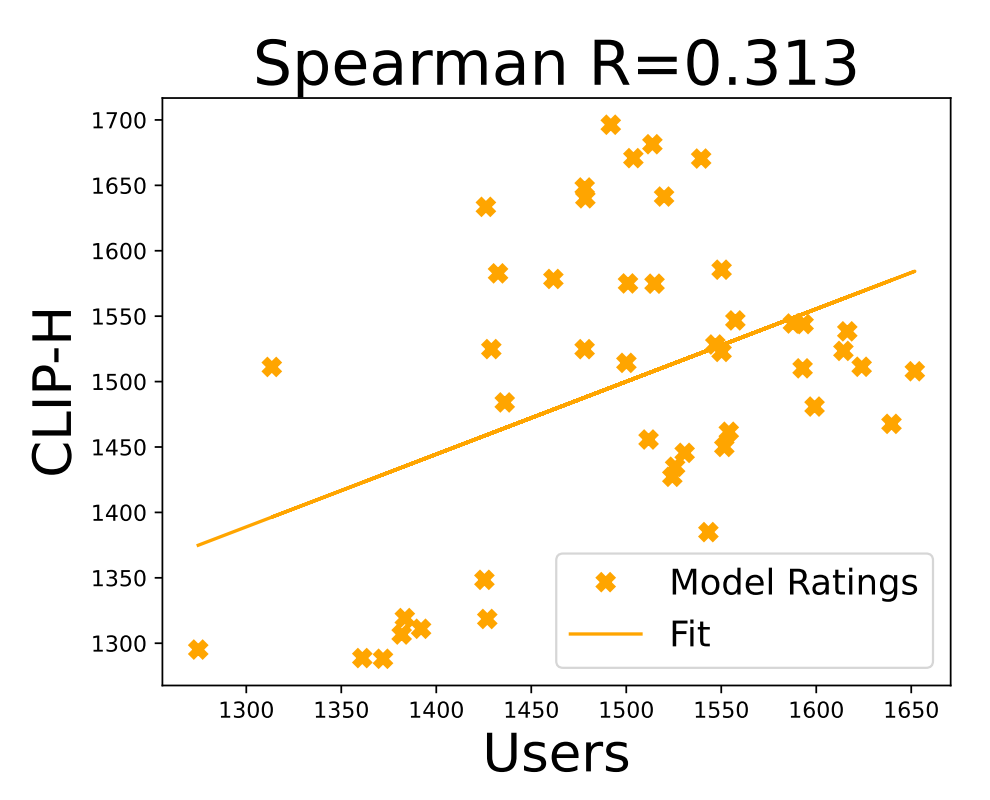
The CLIP score serves as a useful baseline evaluation metric and can be used as an indicator of how well your model is learning the style. However, it is not perfectly correlated with human preferences [2].
It will also not penalize the model for generating distortions which may occur when the model is trained for too long.
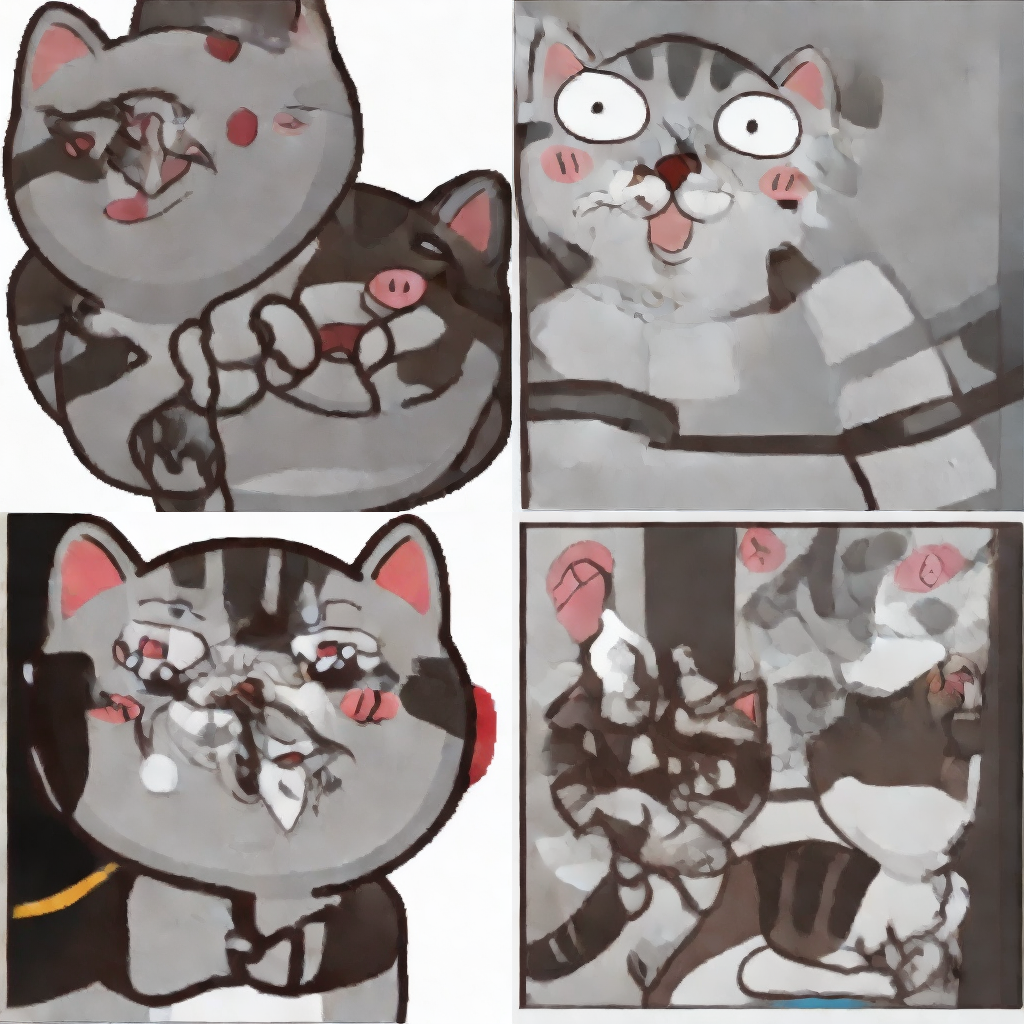
Thus, manual inspection and fine-tuning based on human judgment are still necessary for evaluating the model outputs.
tagDreambooth
Dreambooth [3] was originally a method developed at Google for finetuning diffusion models to generate photos of a particular subject. However, in the Stable Diffusion community, it has come to mean any method that trains the full model. This is different from a training method that only trains on a part of the model, which is what we will describe in the rest of this article.
tagColab Notebook
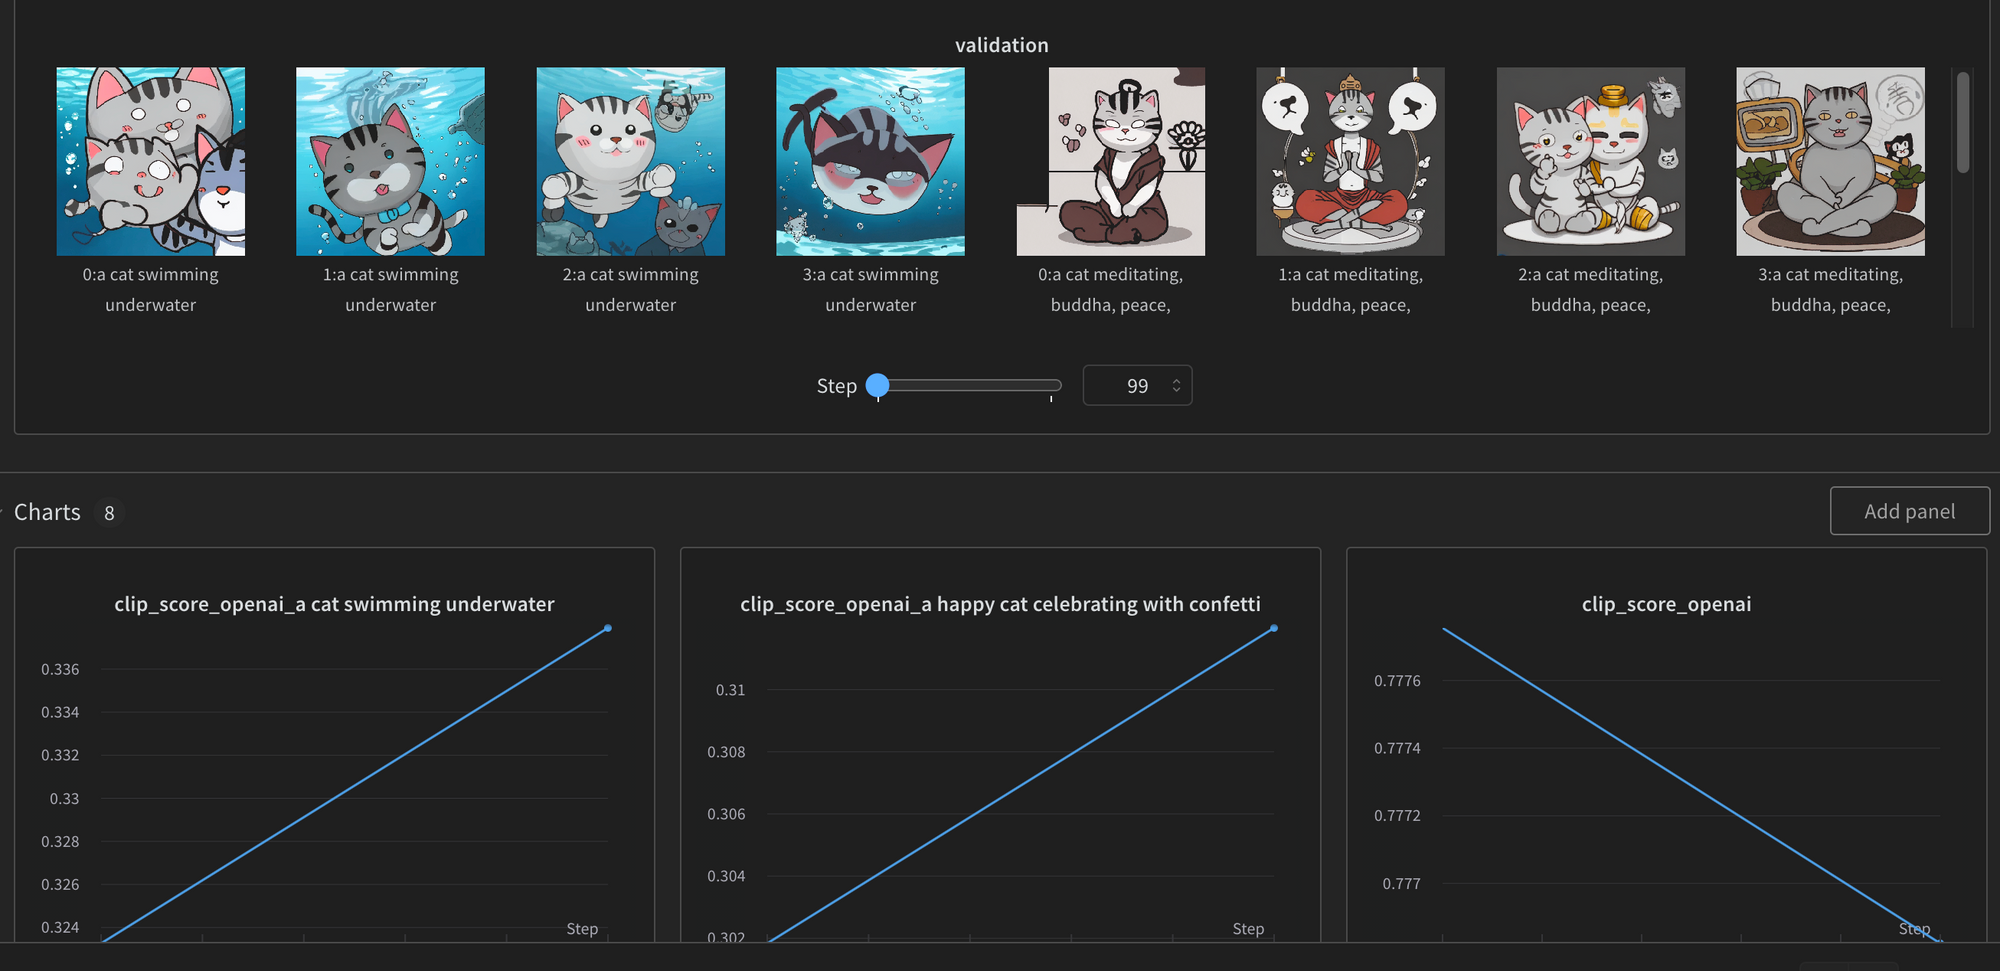
To follow along with our fine-tuning story, use this Colab notebook to start training your model with examples from this blog:

tagLoRAs
Training the full model with Dreambooth is likely to yield the best results. However, this is resource intensive and requires a significant amount of VRAM (graphics card memory). This makes training impossible on some graphics cards. We can, however, lower the amount of VRAM required by using a method called Low-Rank Adaptation (LoRA) [4]. When using LoRA, instead of training the full-weight matrices, we train two lower-ranked versions. This allows us to train with fewer parameters and reduce the amount of VRAM required.
tagGenerating Images
With our Stable Diffusion model fine-tuned and ready to work its magic, we can now easily generate stickers directly within a notebook. If you uploaded your model, you can find the code snippet in the model card to generate images.
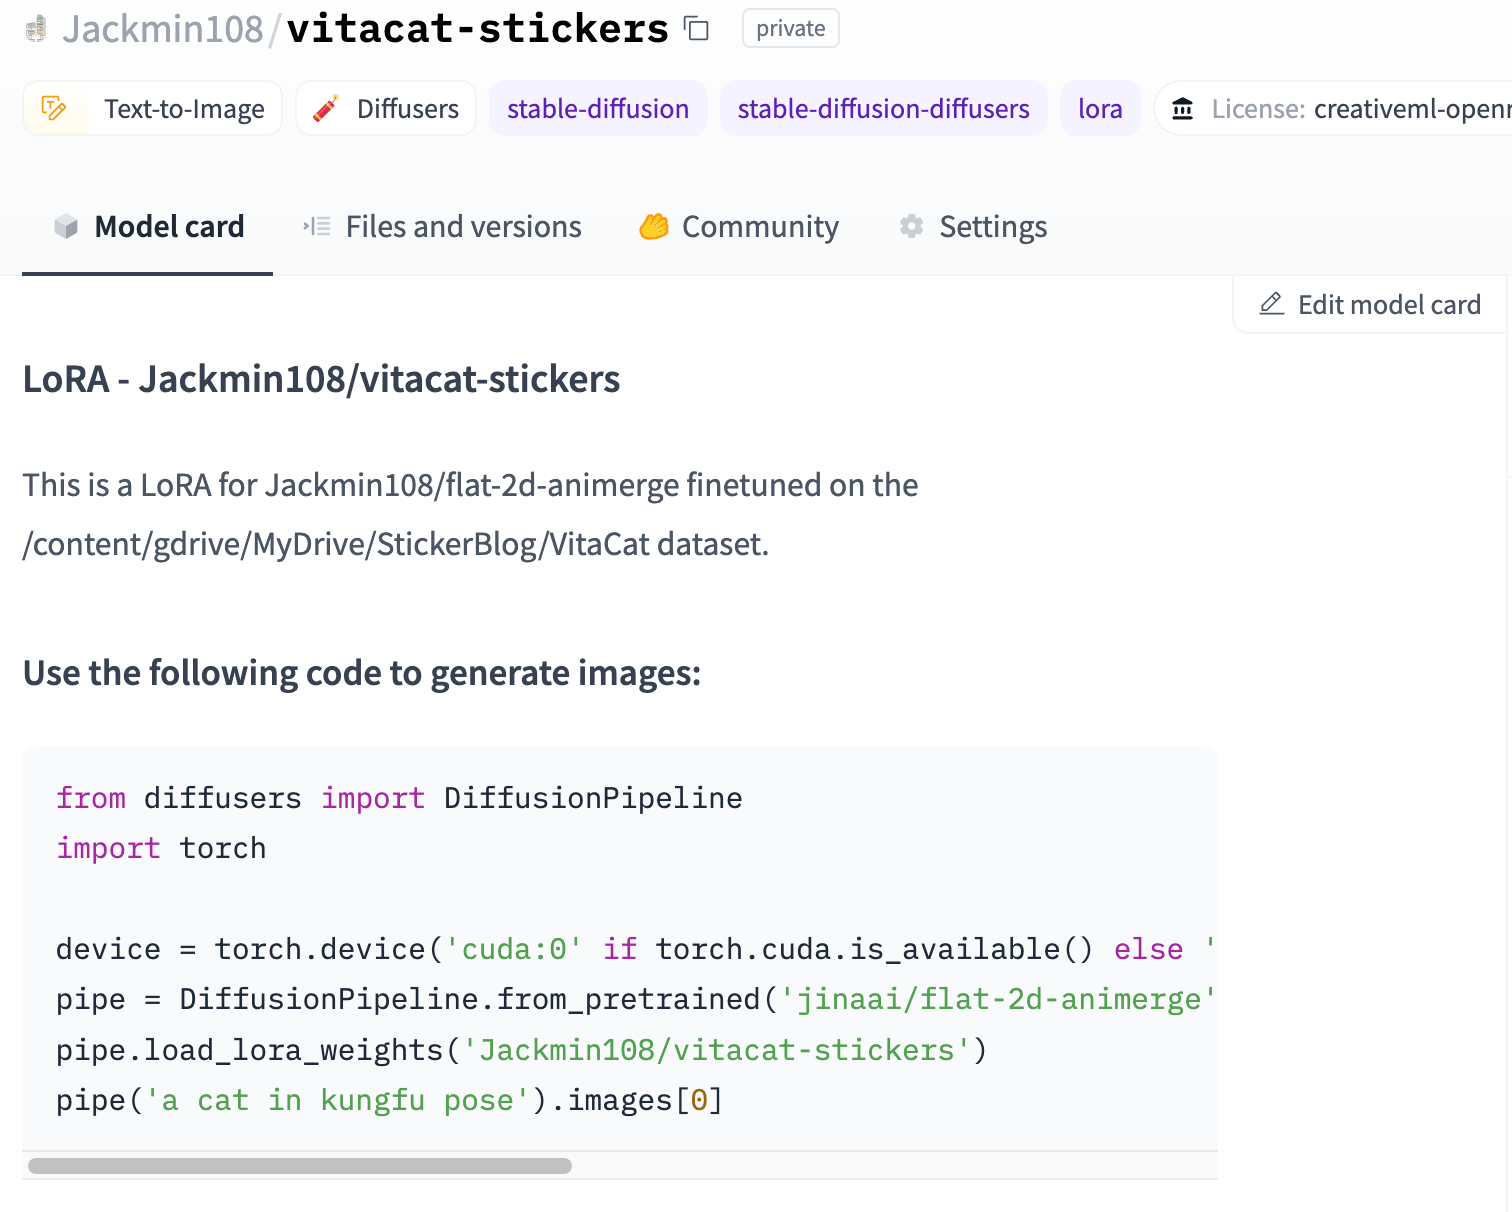
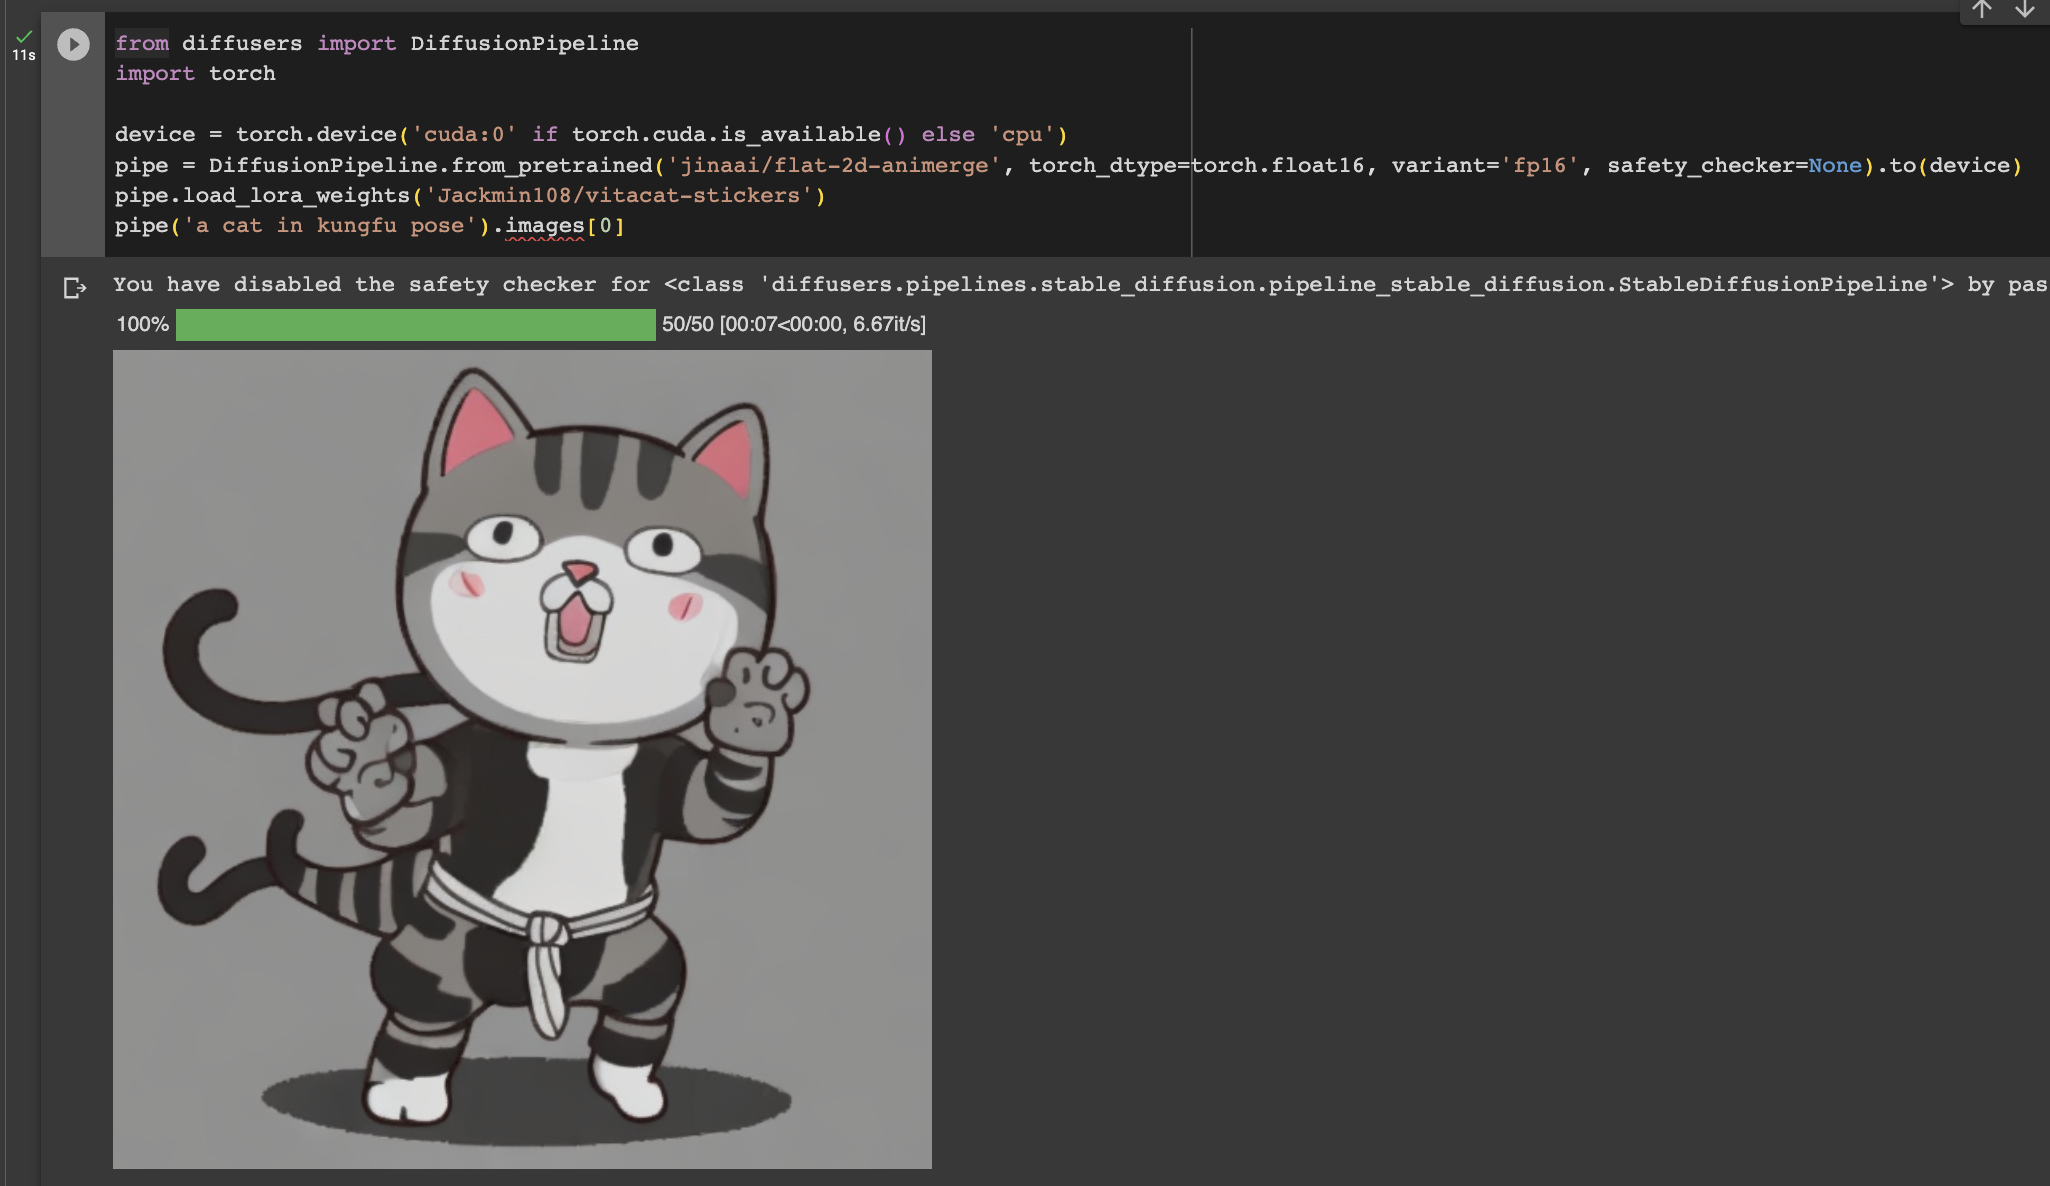
If you did not upload your model, you can instead download it directly in your Colab session using this link - /content/output/pytorch_lora_weights.safetensors. You can then use the path to the downloaded weights to initialize your model.
from diffusers import DiffusionPipeline
import torch
device = torch.device('cuda:0' if torch.cuda.is_available() else 'cpu')
pipe = DiffusionPipeline.from_pretrained('model_checkpoint_id', torch_dtype=torch.float16, variant='fp16').to(device)
pipe.load_lora_weights('/path/to/pytorch_lora_weights.safetensors')
pipe('a cat wearing a hat').images[0]
tagLoading Auto1111
Auto1111 is a popular interface for using Stable Diffusion models. (So popular that when users on Reddit and Discord use the phrase “stable diffusion”, they often mean the web interface and not the model). The interface contains many useful tools for iterating on your images and contains many nice quality-of-life features for working with Stable Diffusion.
To get started, you'll need to install Auto1111 on your specific operating system. Don't worry; the installation process is well-documented and straightforward. Just head over to the repo, and you'll be up and running in no time!
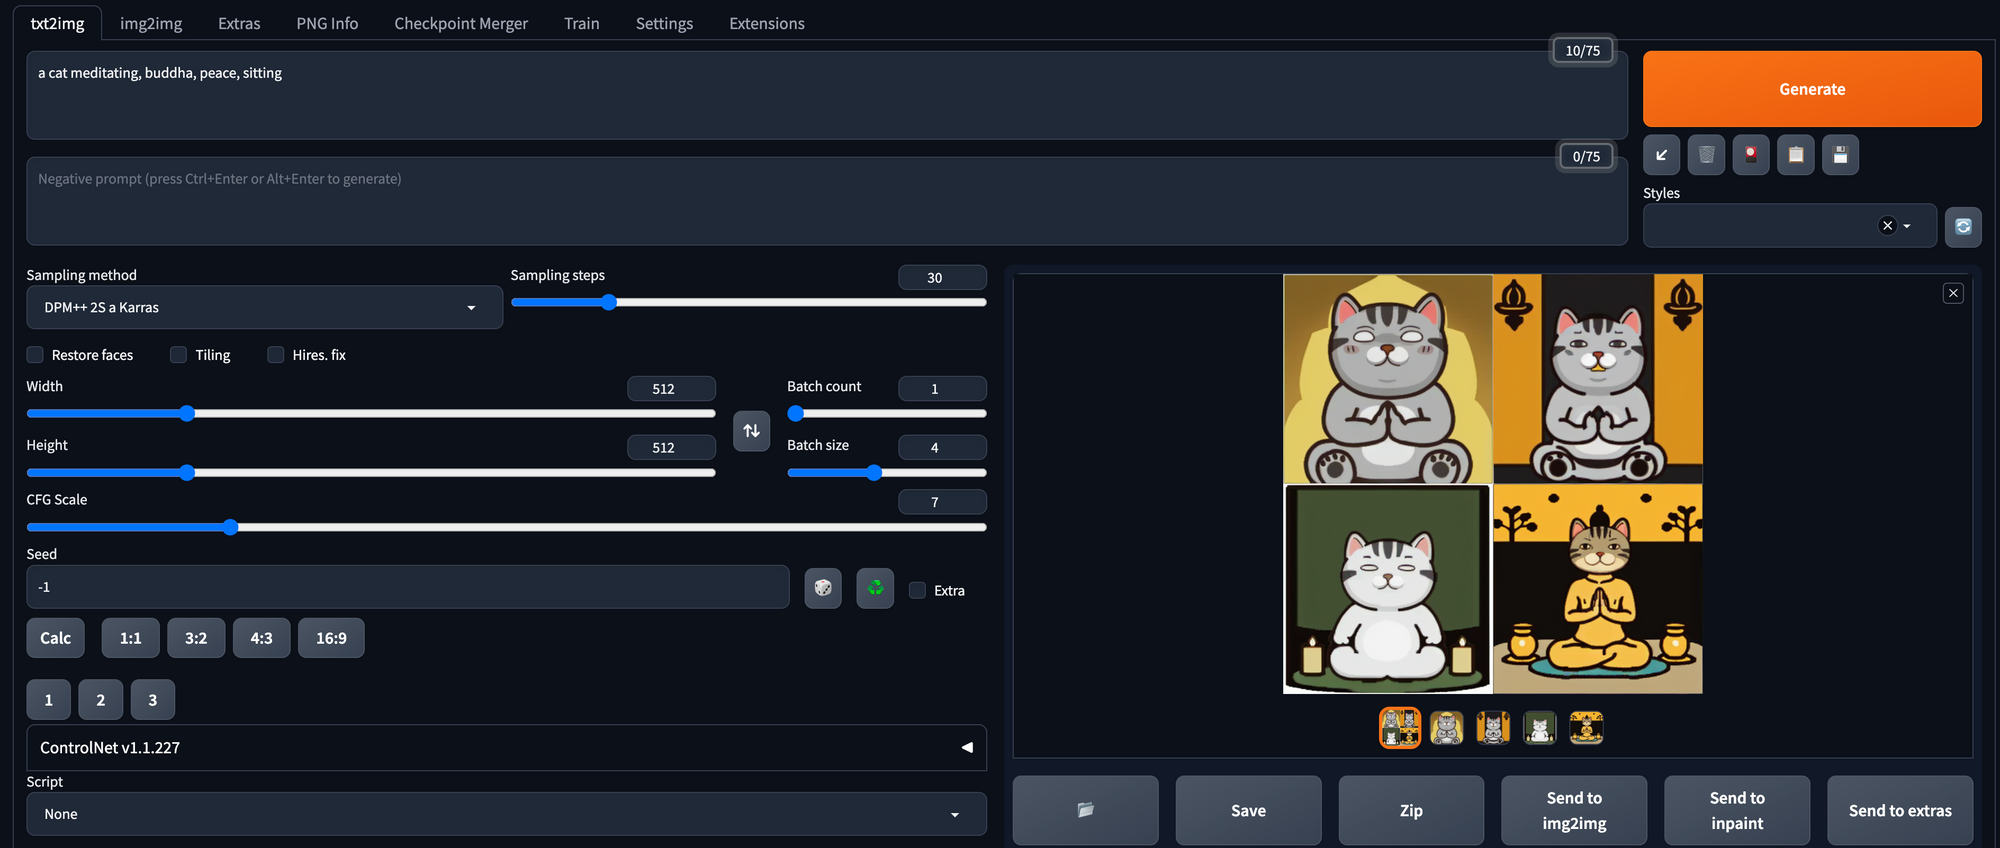
If you trained a LoRA, you can download the weights to your Colab notebook, using this link - /content/output/pytorch_lora_weights.safetensors. Rename the file to an easier name to remember while keeping the safetensors file extension, for example, vitacat.safetensors. Then move your file to the models/Lora folder of your Auto1111 folder. You will then be able to select your model in the LoRA dropdown.
If you trained your model without LoRA, you will have to do a little bit more work. The model we trained using the diffusers library is saved in diffusers format. To convert it to the format used by Auto1111 — PyTorch Checkpoint format, we can use the conversion script from the diffusers library:
We can then place our new file in the models/StableDiffusion folder of our Auto1111 folder. You will then be able to select your model in the model dropdown.
tagPrompt Engineering: Adding the Final Touches
Engineering your image prompts can significantly enhance the quality of the generated images. By using meaningful and descriptive phrases, along with relevant tags, you can achieve remarkable results. For example: a cat meditating, buddha, peace, sitting.

To improve your generated images, consider incorporating concept tags related to the specific image you want to create. Remember, the prompts don't have to be in coherent English; concise descriptions coupled with relevant property tags can significantly increase the chances of generating a high-quality image.
By thoughtfully engineering your image prompts, you can unlock a world of creative possibilities and inspire awe-inspiring visual content. Experiment with different combinations of words and tags, and witness the magic of artificial intelligence bringing your ideas to life!
tagPotential Use Cases for Fine-tuning Stable Diffusion
Finetuning allows one to unlock the full potential of Stable Diffusion, significantly elevating the creative process, and revolutionizing the way we approach art and design. Its remarkable capabilities offer a diverse array of use cases, empowering creators to push the boundaries of their imagination.
Some applications that are particularly exciting:
- Accelerated concept art generation: With Stable Diffusion's ability to quickly generate works in a particular style based on a few examples, artists and designers can kickstart their projects with inspiring concept art. This streamlined iteration process allows them to explore different ideas, visual styles, and themes without investing excessive time, ultimately leading to more innovative and refined final artworks.
- Efficient game asset creation: Game developers are already harnessing cutting-edge technology to generate game assets. Though publishers like Valve are proceeding with caution due to legal concerns, there is little doubt that Stable Diffusion will become a core part of the game asset creation workflow for game developers, enabling them to accomplish in mere hours what previously took months of tedious effort.
- Generating visual aids: For professionals and educators needing visual aids in presentations, Stable Diffusion can serve as a versatile tool for generating clip art. Canva is already leveraging the technology to generate custom graphics for use in presentations. By enabling swift generation of customizable, high-resolution graphics, these tools will save users considerable time and effort. With less time spent on visual elements, users can focus on generating and refining their ideas.
By embracing the potential of finetuning Stable Diffusion, artists and creators gain a powerful ally that enhances their productivity and allows them to explore uncharted artistic territories. While some legal gray areas warrant caution, the benefits of this technology for concept development, design acceleration, and visual content creation are undeniable. As technology evolves, it promises to revolutionize the creative landscape, enabling a new era of artistic expression and efficiency.
tagConclusion
In this blog post, we embarked on an exciting journey into the world of fine-tuning Stable Diffusion models to generate more of our favorite stickers. Though these models aren't flawless at generating stickers, their imperfections often lead to delightful happy accidents that add a touch of comedic brilliance to our stickers.
For exploring more use cases of fine-tuning text2image models with your proprietary data, reach out to us using our contact form or our Discord channel.
Now, let me share with you some of the enchanting stickers that I am particularly proud of:



tagReferences
[2] Kirstain, Y., Polyak, A., Singer, U., Matiana, S., Penna, J., & Levy, O. (2023). Pick-a-Pic: An Open Dataset of User Preferences for Text-to-Image Generation. https://arxiv.org/pdf/2305.01569.pdf.
[3] Ruiz, N., Li, Y., Jampani, V., Pritch, Y., Rubinstein, M., & Aberman, K. (2022). DreamBooth: Fine Tuning Text-to-Image Diffusion Models for Subject-Driven Generation. ArXiv, abs/2208.12242. https://arxiv.org/pdf/2208.12242.pdf.
[4] Hu, E.J., Shen, Y., Wallis, P., Allen-Zhu, Z., Li, Y., Wang, S., & Chen, W. (2021). LoRA: Low-Rank Adaptation of Large Language Models. https://arxiv.org/abs/2106.09685.
[5] Radford, A., Kim, J.W., Hallacy, C., Ramesh, A., Goh, G., Agarwal, S., Sastry, G., Askell, A., Mishkin, P., Clark, J., Krueger, G., & Sutskever, I. (2021). Learning Transferable Visual Models From Natural Language Supervision. https://arxiv.org/pdf/2103.00020.pdf.
