Accessibility (or "a11y" for short) is fast becoming an important part of web development and e-commerce. Back in the day, accessibility aids like alt text or color-blind-friendly color schemes weren't seen as high priorities by developers and companies. But now, with accessibility legislation from Europe and the USA, making your website accessible is more important than ever before.
But how can you go about creating alt text for every image on your website? Manually going through each image and writing alt text could take forever, especially if you have thousands (or millions) of images. And if more are being added every day, it becomes a never-ending battle.
That’s where SceneXplain comes in. It’s your a11y ally! You can simply upload an image and get alt text for it without having to wrack your brain thinking of the wording yourself.
If you have, say, a few dozen images, this is a good way to give your brain a break. But you still need to do all the clicking and dragging yourself. Your brain wins, but your fingers don't. And if you have a few thousand images? Call the doctor now to pre-book your carpal tunnel appointment.
If only there were a way you could automate the whole thing. Then your brain and fingers could both focus on more interesting things.
That's where SceneXplain's API comes in. You can write a script that will go through your thousands of images, send them in batches to SceneXplain, and generate a CSV file with the results (or with a bit more coding, integrate directly into your workflow.)
After all, you know what they say. You can't spell happiness without APIness.
tagWhat is an API?
But before we dive into the how, let's look at the what. The Oxford English Dictionary defines API as:

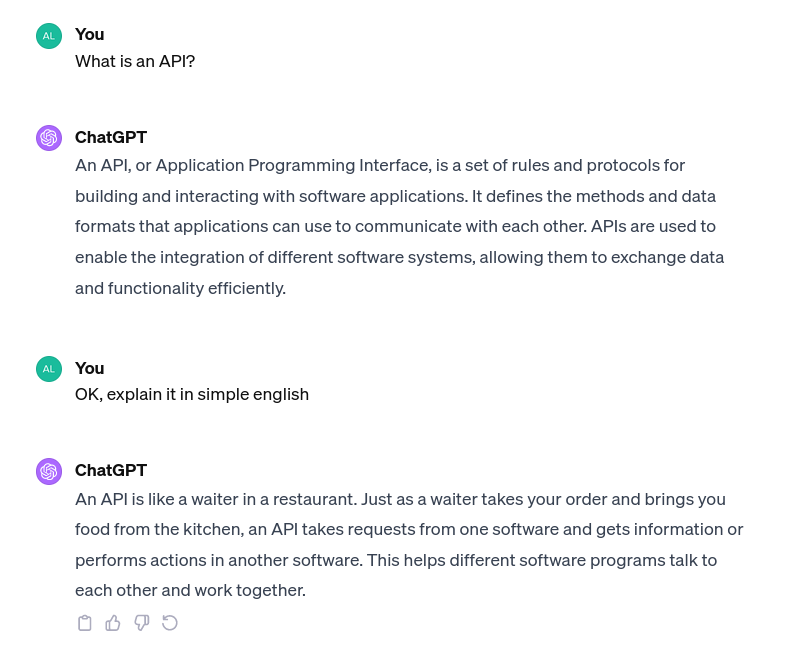
However, everyone's favorite AI, GPT-4 defines an API as:

Or, if you prefer a video explanation:
In short, you can write a Python (or any other language) program to talk to SceneXplain via its API and automate your whole alt-tagging process. We have a Python snippet that does just that.
Here’s how you use it:
- Install the requests library:
pip install requests
- Go to SceneXplain’s API page to generate a secret key and copy it to your clipboard.
- Paste it into the Python code below.
- Copy an image URL into the code where it says
..... - Run the code!
import requests
import json
# generate token on SceneXplain's API page
YOUR_GENERATED_SECRET = "your_generated_secret_here"
data = {
"data": [
{
"task_id": "alt_text",
"languages": [
"en"
],
"image": "..." # change to image URL
}
]
}
headers = {
"x-api-key": f"token {YOUR_GENERATED_SECRET}",
"content-type": "application/json",
}
response = requests.post("https://api.scenex.jina.ai/v1/describe", headers=headers, json=data)
print(response.json())
(We’ll put in more code snippets later for cURL and JavaScript)
tagAPI in action: SceneXplain in a Notebook
Since we want to see this in action, we’ll use the code live in a notebook. That lets you see what’s happening in real time with real data, and lets you examine and play with the Python code yourself.

The notebook goes beyond just the simple Python snippet above. It also downloads a sample dataset and exports the results to a CSV file.
tagBeyond the notebook: Using the API IRL
Of course, you’re not limited to Python when you use SceneXplain’s API. Any language that has an HTTP library should work fine.
Here’s that same code snippet from above, this time in JavaScript:
const body = {
"data": [
{
"task_id": "alt_text",
"languages": [
"en"
],
"image": "..."
}
]
};
const YOUR_GENERATED_SECRET = 'your_generated_secret_here';
fetch('https://api.scenex.jina.ai/v1/describe', {
headers: {
'x-api-key': `token ${YOUR_GENERATED_SECRET}`,
'content-type': 'application/json'
},
body: JSON.stringify(body),
method: 'POST'
}).then(async (resp) => {
if (resp.ok) {
const data = await resp.json();
console.log(data);
}
});
And this time as a cURL command:
curl "https://api.scenex.jina.ai/v1/describe" \
-H "x-api-key: token $YOUR_GENERATED_SECRET" \
-H "content-type: application/json" \
--data '{
"data": [
{
"task_id": "alt_text",
"languages": [
"en"
],
"image": "..."
}
]
}'tagImprove your image accessibility with SceneXplain’s API
To get started, head over to SceneXplain’s API page to brush up on how it all works, generate a secret key, and then either adapt our notebook or create your own code to start improving accessibility today!


